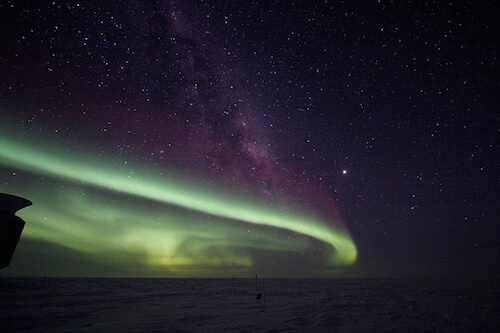
If you’re ever near the North or South Pole, you may be in for a very special treat. Frequently there are beautiful light shows in the sky. These lights are called auroras. These displays are caused by energy that comes from the sun. Click here to learn all about how auroras happen.
The colors of auroras are the result of atoms in the atmosphere interacting with energy from the sun. The atoms get excited and release bursts of light energy.
Auroras are usually red, green, and blue. The red color is from oxygen atoms in the atmosphere. The greens and blues are the result of nitrogen. Sometimes these colors mix and yellow and pink colors will be seen in the sky too.
In this activity, you can make your own colorful aurora with oil pastels.
What you need:
- Pastel Aurora Guide (PDF)
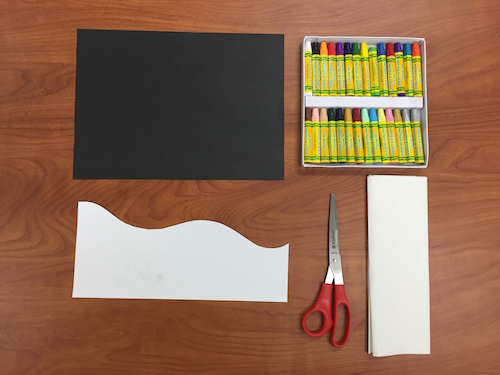
- Black construction paper
- Oil pastels
- Scissors
- Paper towels
What to do:
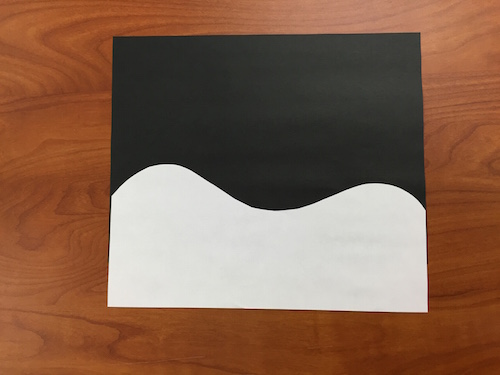
- Cut out your aurora guide. You may use the provided guide, or you may cut your own wavy shape.
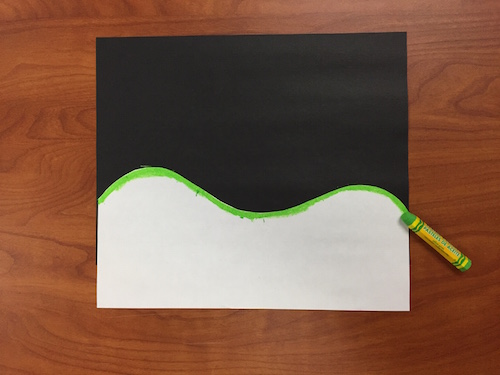
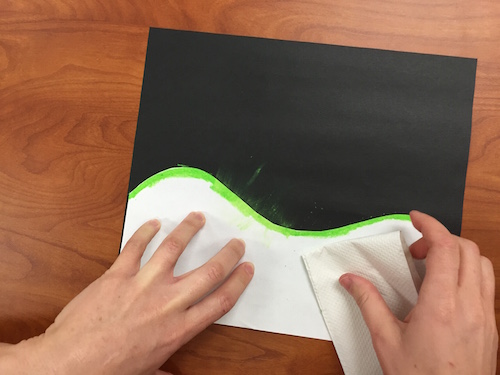
- Trace along the shape of the curve with your pastels. Go back and forth a few times so lots of color gets on the guideline. It's okay to get a little bit on the black construction paper too.
- Hold your guideline down with one hand, and with the other, use your paper towel to push the pastel upward so it smudges onto the construction paper.
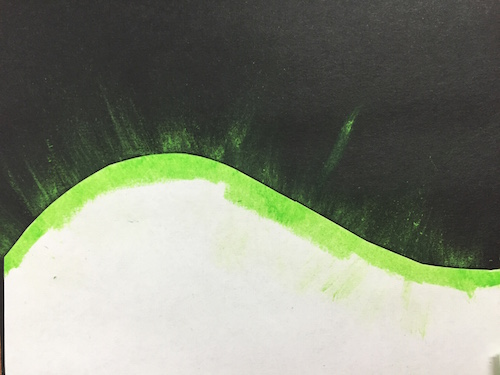
- You can go over the area again with more pastels and smudge again with the paper towel until you have as much color as you want.
- Lift up the guideline to see the colorful band.
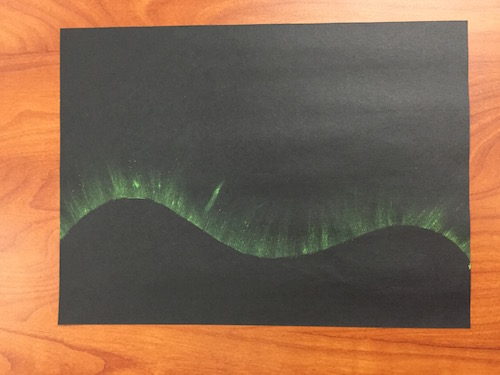
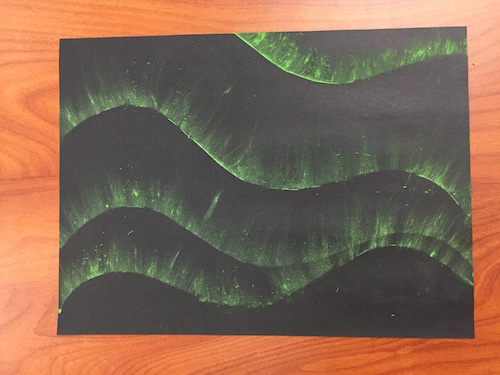
- Place the guideline in a different spot and repeat steps 2 and 3 as many times as you like. Try flipping the guideline over or placing it at different angles to add to the overall effect of the painting.
- Display your aurora masterpiece so everyone can see it. Be sure to tell them what the colors mean and why auroras happen!
Download a PDF of this activity.
Related Resources for Educators
Launchpad: Aurora Lights: Why They Exist and What Causes Them?