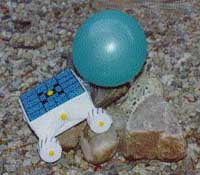
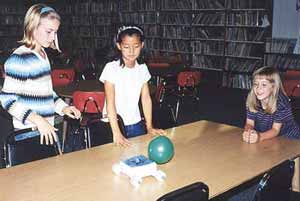
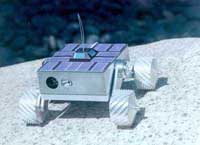
Roving a mini-"planet" calls for a "mini-rover." NASA built a tiny rover just a couple of inches high to explore the surface of an asteroid and take pictures.
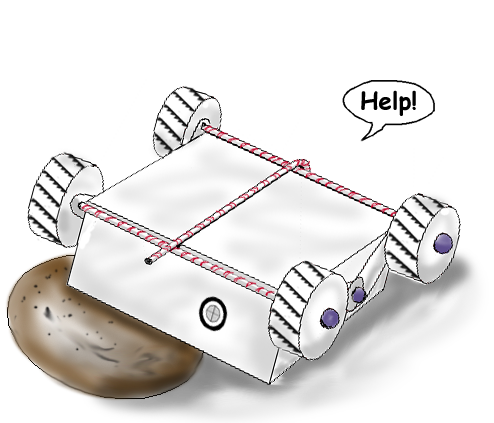
You can build a nanorover too. Try this one, made from three styrofoam meat trays.
What to do: |
1. |
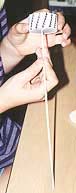
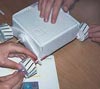
Print out pattern sheet, plus sheet with top and camera decals and wheel treads. Cut out pattern pieces, top decal, camera decal, and wheel tread strips. |
| 2. |
Place pattern pieces on styrofoam trays (avoid curved areas on edges) and trace around them with the pen. Be sure you have traced the correct number of pieces: 2 body pieces, 8 wheels, 4 wheel struts, and 2 shoulders. |
| 3. |
Carefully cut out the styrofoam pieces. Make the wheels as perfectly round as you can and all exactly the same size. |
| 4. |
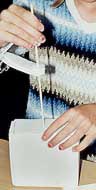
Mark the exact centers of wheels by poking the tip of a bamboo skewer through the mark on the pattern and into the styrofoam. Also, mark the holes on the body pieces, wheel struts, and shoulders the same way. Mark the fold lines just on the very edges of the body pieces. |
| 5. |
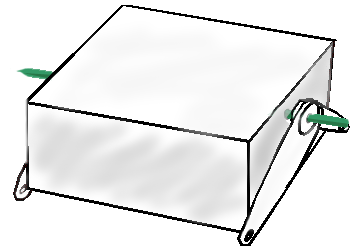
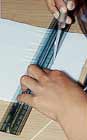 On the body pieces, use the ruler and the small knife to score (cut just part-way through) the pieces on the fold lines. On the body pieces, use the ruler and the small knife to score (cut just part-way through) the pieces on the fold lines.
|
| 6. |
 Now, fold the sides (the flaps) down on the score lines to make each piece into half of a box. Now, fold the sides (the flaps) down on the score lines to make each piece into half of a box.
|
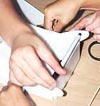
| 7. |
 Tape the sides together on the inside to make corners stay put. Tape the sides together on the inside to make corners stay put.
Hint: For most taping jobs (except on the wheels), you will find that long pieces (about 2 inches) of tape work best. |
| 8. |
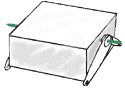
 Put the two halves of the nanorover body together to make a box and tape corners and edges on outside. Put the two halves of the nanorover body together to make a box and tape corners and edges on outside.
|
| 9. |
Using the sharp end of a skewer, poke holes in the exact center (as marked on the pattern) of two opposite sides of the body. |
| 10. |
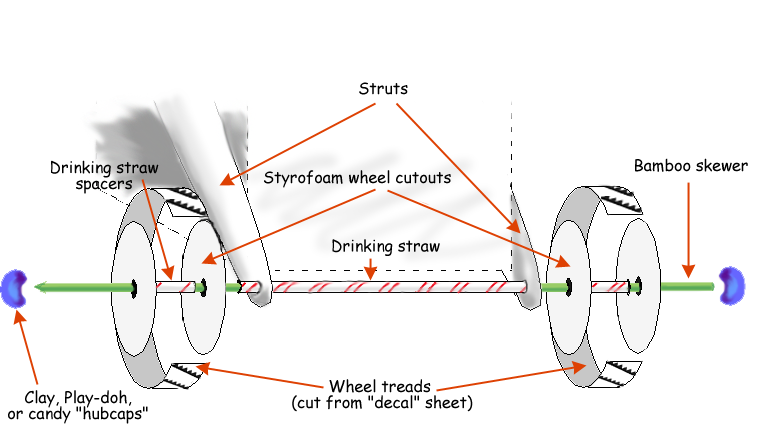
Now, poke the sharp end of a bamboo skewer through the mark on one of the shoulder pieces, then through the smaller mark on each of two strut pieces. |
| 11. |
 Now, insert the skewer into one of the holes you made in the side of the nanorover body. Looking through the little hole in the opposite side of the nanorover to help you line up the skewer, poke the skewer the rest of the way through the body. Now, insert the skewer into one of the holes you made in the side of the nanorover body. Looking through the little hole in the opposite side of the nanorover to help you line up the skewer, poke the skewer the rest of the way through the body.
|
| 12. |
 Finally, thread the other two struts and the other shoulder piece onto the skewer. Finally, thread the other two struts and the other shoulder piece onto the skewer.
Leaving about 1/2 inch of the skewer sticking out on both sides, carefully cut or break off the excess length of skewer. Put a blob of clay or Play-doh, or a gum drop, on the ends of the skewer.
|
| 13. |
 Now decide which is the bottom of your nanorover body. Line up the free end of each strut with a bottom corner of the nanorover body and use the ballpoint pen to poke good-sized holes in the smaller ends (will be near the larger hole marks on the pattern). You want to position these holes so that when the drinking straw "wheel axle" is threaded through them, the straw will fit right against the bottom front and back corners. Now decide which is the bottom of your nanorover body. Line up the free end of each strut with a bottom corner of the nanorover body and use the ballpoint pen to poke good-sized holes in the smaller ends (will be near the larger hole marks on the pattern). You want to position these holes so that when the drinking straw "wheel axle" is threaded through them, the straw will fit right against the bottom front and back corners.
|
| 14. |
 Thread a straw through the holes in the front struts and another straw through the holes in the back struts. Tape the straws to the bottom edges of the nanorover body. Trim the straws so they stick out about 1/4 inch beyond the struts on both sides. Thread a straw through the holes in the front struts and another straw through the holes in the back struts. Tape the straws to the bottom edges of the nanorover body. Trim the straws so they stick out about 1/4 inch beyond the struts on both sides.
|
| 15. |
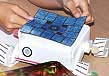
Look at the picture below as you follow these directions for assembling the wheels:
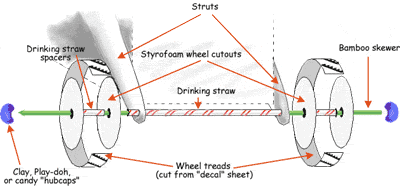
| • |
 Put two styrofoam wheels together to make a form and wrap one of the paper "tread" strips around it, taping the end. |
| • |
 Take the styrofoam wheels out of the tread strip, which we will now call a tread circle. Set the tread circle flat on the table and drop one of the styrofoam wheels into it. The styrofoam wheel should lie flat on the table with the tread circle surrounding it. Tape the wheel to the tread circle from the inside. This makes the outside of one wheel. Take the styrofoam wheels out of the tread strip, which we will now call a tread circle. Set the tread circle flat on the table and drop one of the styrofoam wheels into it. The styrofoam wheel should lie flat on the table with the tread circle surrounding it. Tape the wheel to the tread circle from the inside. This makes the outside of one wheel.
|
| • |
 Poke the sharp end of a bamboo skewer through the exact center of this styrofoam wheel. Cut a small piece (about 3/4 inch) from one of the straws. Slide this piece onto the skewer and into the inside of the wheel you are making. Now slide another styrofoam wheel-through its exact center-onto the skewer and right against the tread circle and drinking straw spacer (to make the inside surface of the wheel). If the spacer is too long and prevents the inside wheel from resting against the tread circle, slide the piece of the straw off the skewer and trim it a bit. Poke the sharp end of a bamboo skewer through the exact center of this styrofoam wheel. Cut a small piece (about 3/4 inch) from one of the straws. Slide this piece onto the skewer and into the inside of the wheel you are making. Now slide another styrofoam wheel-through its exact center-onto the skewer and right against the tread circle and drinking straw spacer (to make the inside surface of the wheel). If the spacer is too long and prevents the inside wheel from resting against the tread circle, slide the piece of the straw off the skewer and trim it a bit.
|
| • |
 Tape this second styrofoam wheel onto the tread circle using four small pieces of tape. Tape this second styrofoam wheel onto the tread circle using four small pieces of tape.
|
| • |
Slide the skewer with its wheel through one of the straw axles already attached to the body of the nanorover. |
| • |
 Make the second wheel as you did the first one, sliding it onto the skewer after taping the first styrofoam wheel onto the tread circle, then adding the straw spacer, and the second styrofoam wheel. Make the second wheel as you did the first one, sliding it onto the skewer after taping the first styrofoam wheel onto the tread circle, then adding the straw spacer, and the second styrofoam wheel.
|
| • |
 Put a blob of clay (or Play-doh or a gum drop) onto the blunt end of the skewer. Put a blob of clay (or Play-doh or a gum drop) onto the blunt end of the skewer.
|
| • |
Adjust the spacing of the wheels and straw on the skewer so that there is about 1/4 inch between the ends of the straw and the wheels. Be sure the wheels do not touch the straw, or they will not turn easily. Carefully break or cut off the excess length of skewer on the sharp end, and put another blob of clay or a gum drop on that end. |
| • |
Repeat for the second set of wheels. |
|
| 16. |
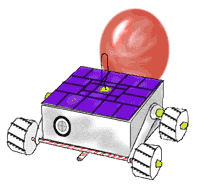
Blow up the small balloon once or twice to stretch it out a bit. |
| 17. |
Bend the last straw at its flexible neck. Use the rubber band to attach the balloon securely to the end nearest the bend in the straw. |
| 18. |
Tape the long part of the straw to the bottom of the nanorover, crosswise to the wheel axles. Tape the short end with the balloon against the front (or back—it makes no difference) of the nanorover. |
| 19. |
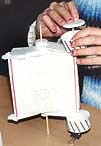
 Color the top "decal" to look like solar cells (dark blue) or any color you like. Tape the decal to the top. You can make "double-sticky" tape loops for this job so the tape doesn't show on the decal. Color the top "decal" to look like solar cells (dark blue) or any color you like. Tape the decal to the top. You can make "double-sticky" tape loops for this job so the tape doesn't show on the decal.
|
| 20. |
Tape the camera lens decal to the back or front of the rover. (On the real rover, it is on the front; on your rover, you might imagine the balloon, which is on the front, might get in the way of the camera!). Use a small double-sticky tape loop for this job too. |
| 21. |
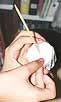
Straighten out half the large paper clip. Poke it through a blob of clay or a gum drop, then through the circle on the top to make an antenna. |
| 22. |
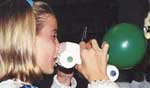 Blow up the balloon through the straw, put your finger over the end of the straw, set the nanorover on the floor or a clear table and let it go. You may find that the nanorover goes better on a smooth, hard surface, than on carpeting. Blow up the balloon through the straw, put your finger over the end of the straw, set the nanorover on the floor or a clear table and let it go. You may find that the nanorover goes better on a smooth, hard surface, than on carpeting.
|
Your nanorover won't go very fast, but it still goes faster than the real one!